Animal Mosaic

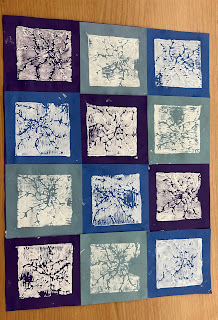
Description - To begin this activity, we chose an animal that was provided. The instructors had several different pictures of different animals on the front table that we could choose from. Once I had chosen my animal and picture, I began to sketch it out on a white piece of construction paper. After I was done sketching it out, I picked construction paper that was already cut into small squares. They had several different colors to choose from. Once I had picked all of the colors I wanted, I began to rip and glue them to my sketch. I was able to make the squares as small as I wanted. I had to make sure that I filled up the majority of the paper with colored construction paper. There was supposed to be very little showing between the construction squares.
Extension Activity - Another activity that I would use with paper and creating a mosaic would be to have the students create a landscaping mosaic. The students would be able to choose whatever type of landscaping they would like. It could be a sunset, the road to a house, the desert, the beach, etc. When the students have decided what landscaping they would like to do, then they would draw it onto a white sheet of construction paper. They could have as much or as little detail as they would like. However, they would be expected to incorporate a certain amount of colors and objects into their project. Once they are done with their sketches, then they would be able to pick the colors of construction paper that they would like to use. The construction paper can already be cut or the students would be able to cut or rip it themselves. After they pick their colors, then they would begin to glue smaller shapes to their sketch. They will have to fill up the majority of their paper with colored construction shapes. There should be little to no white showing when they are done.
Comments
Post a Comment